Note that you can click on photos for a larger view.
In my browser, a click on the larger photo gives you an even larger view.

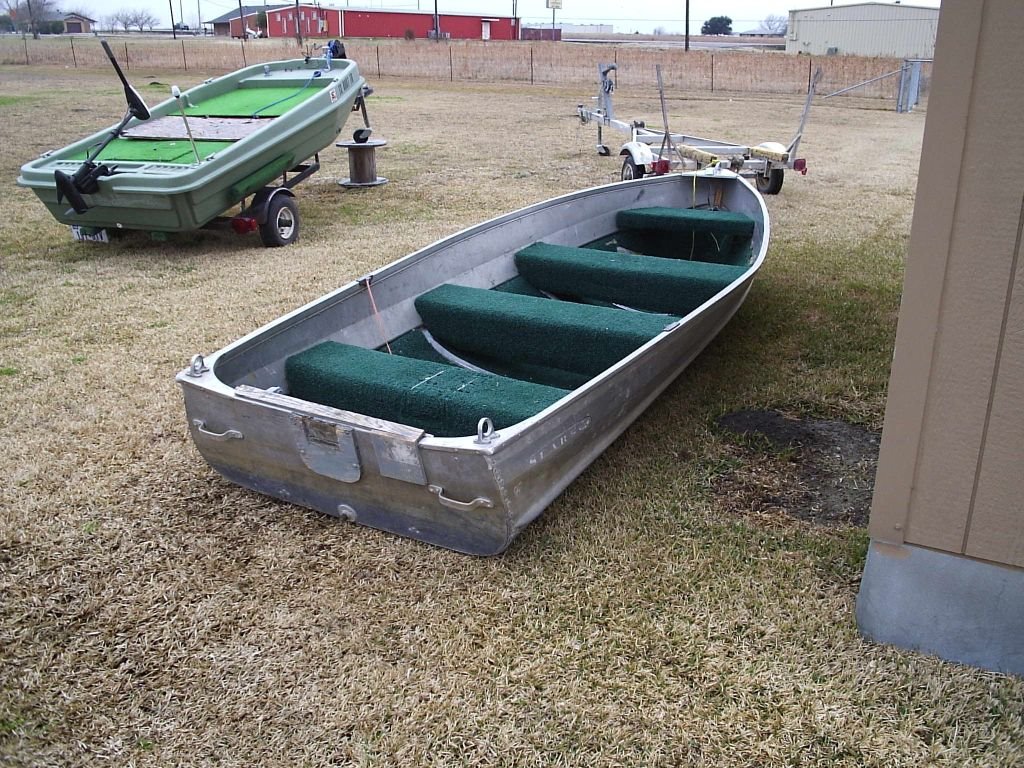

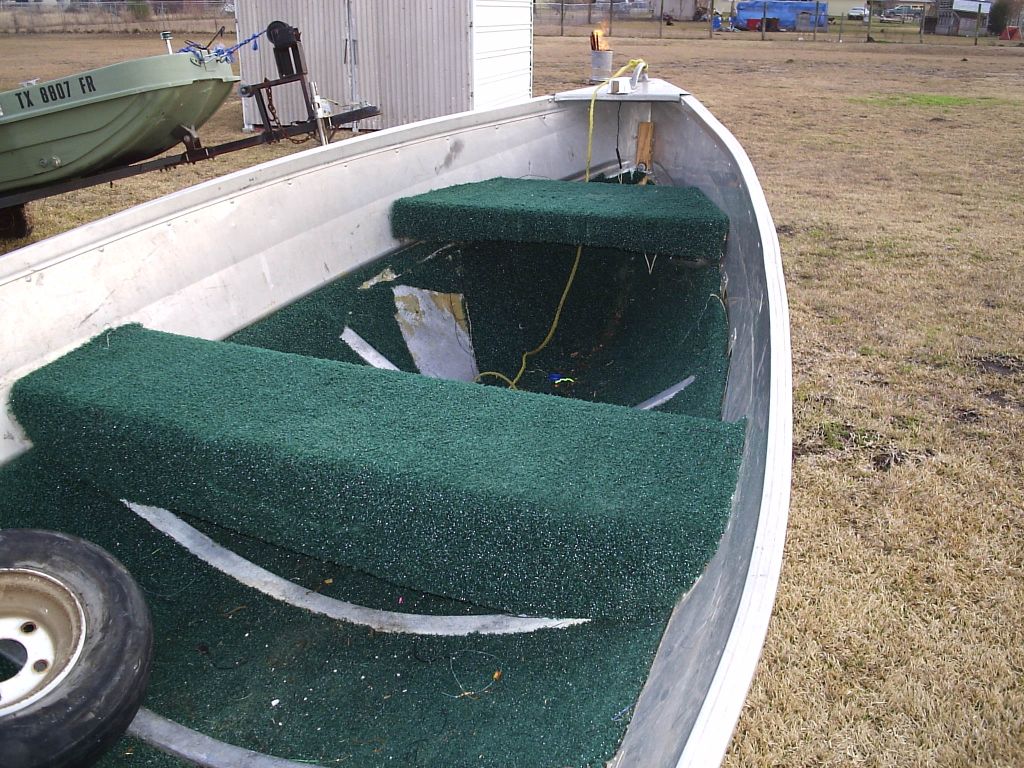
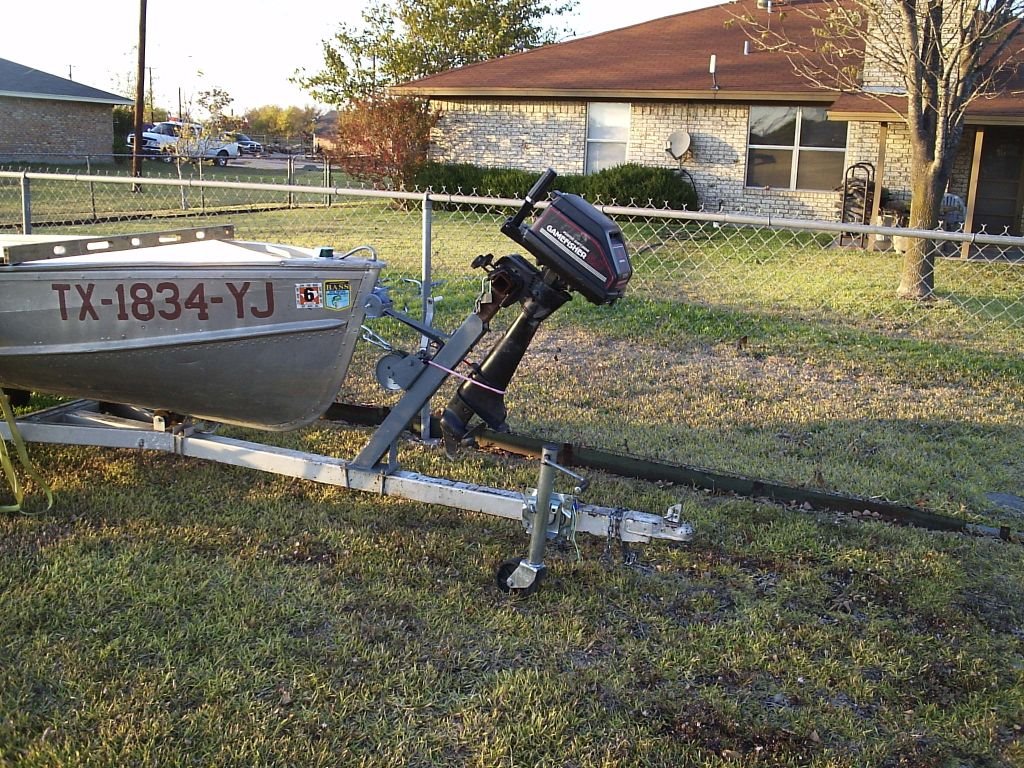
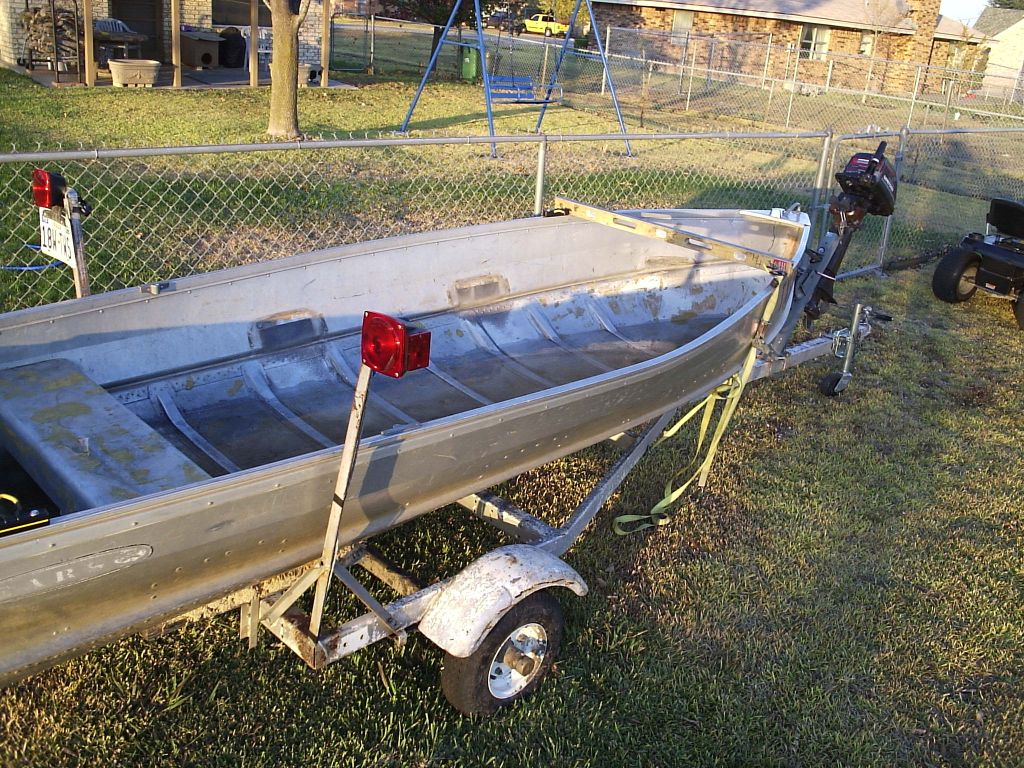


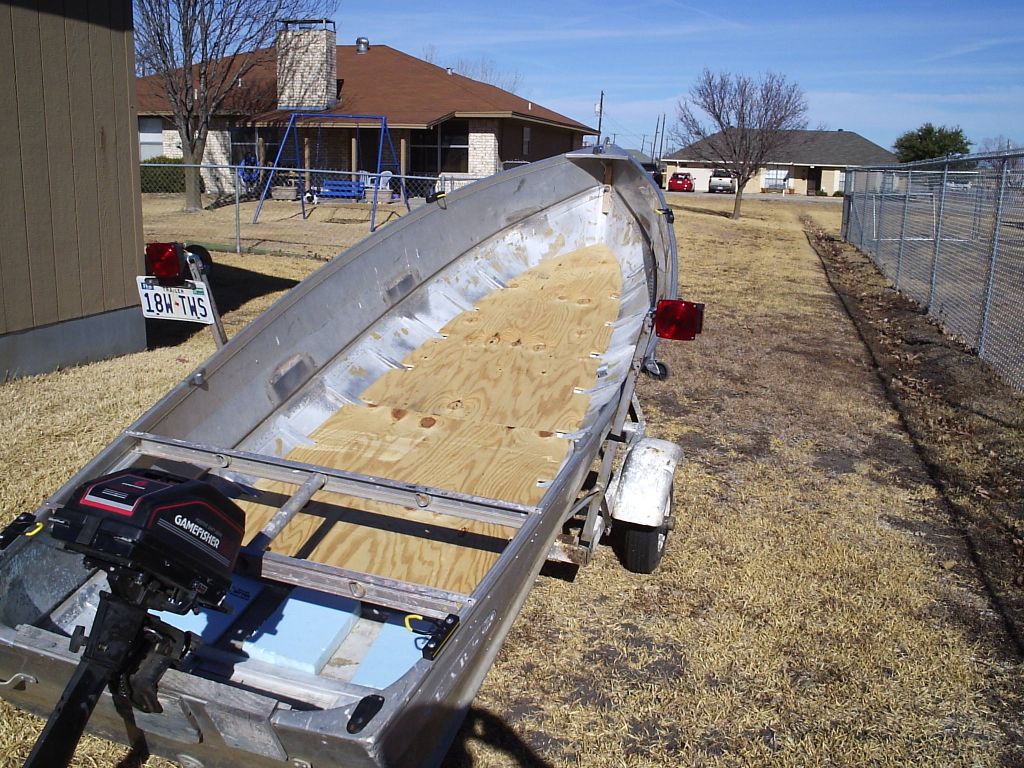

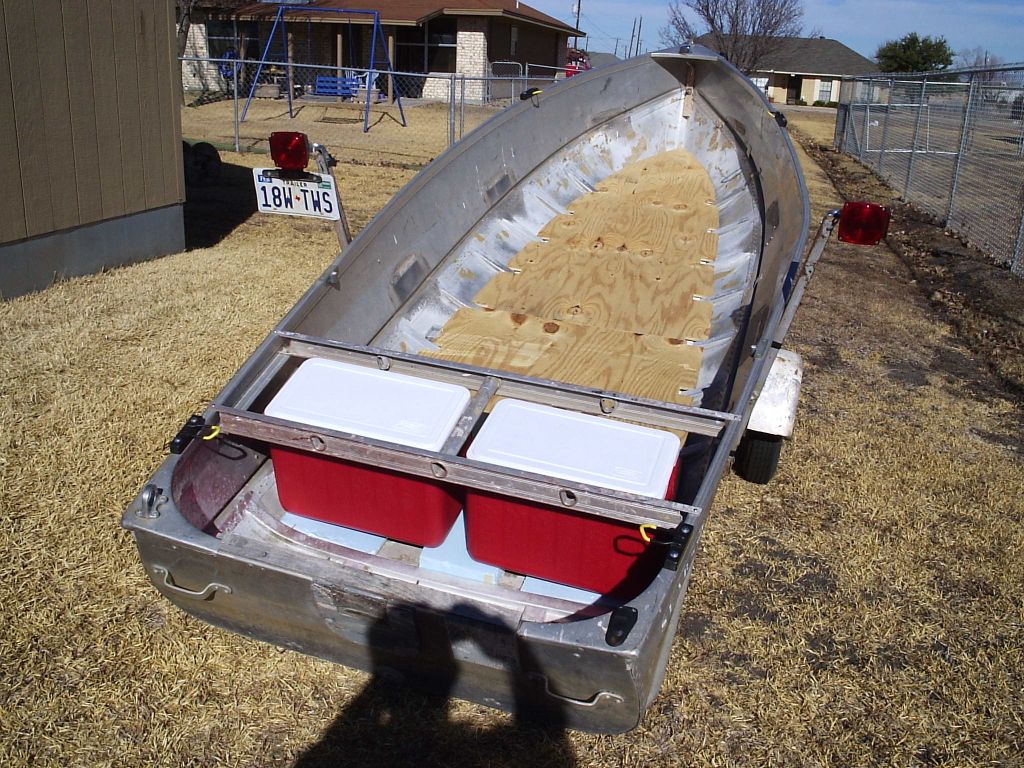
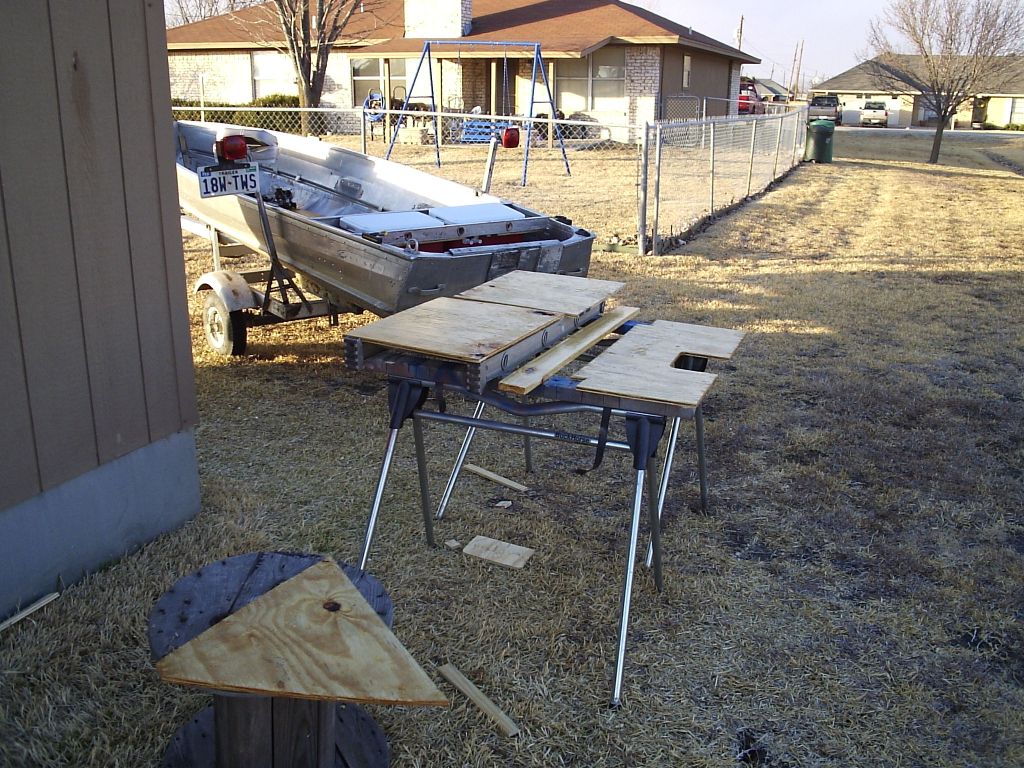

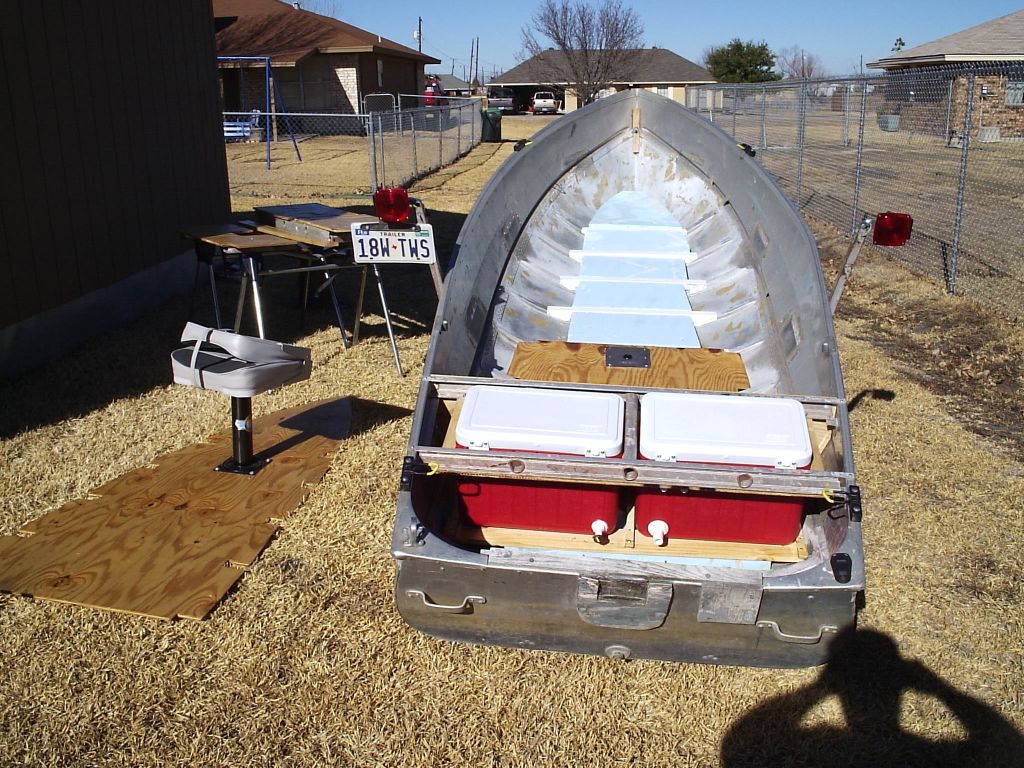
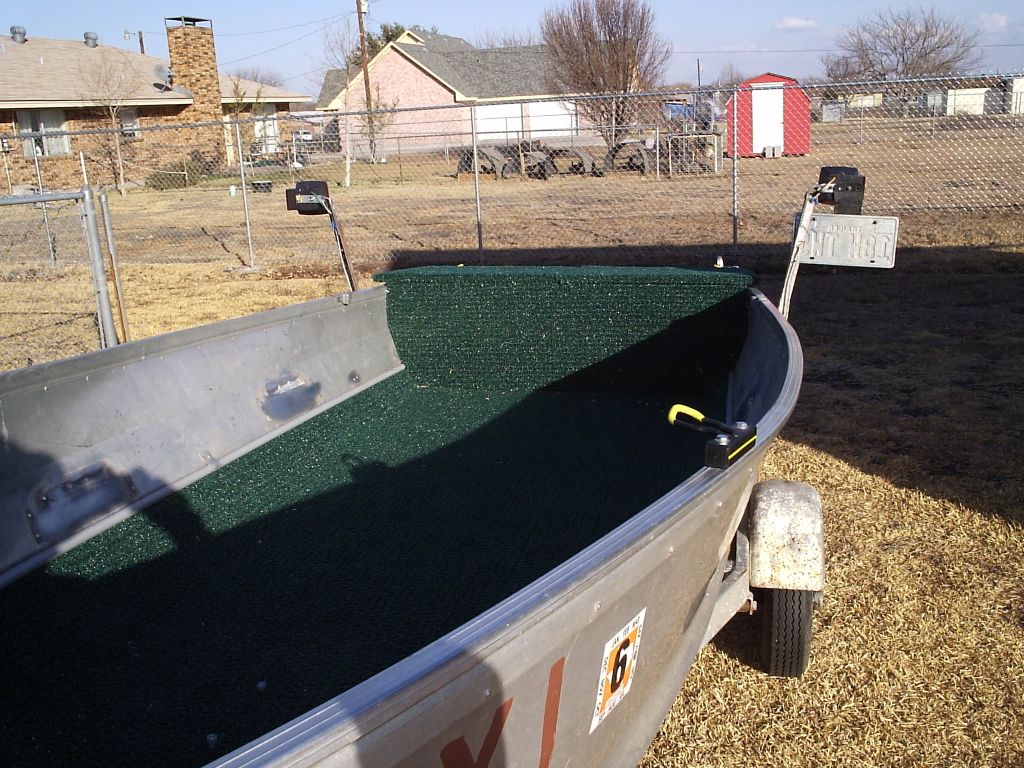
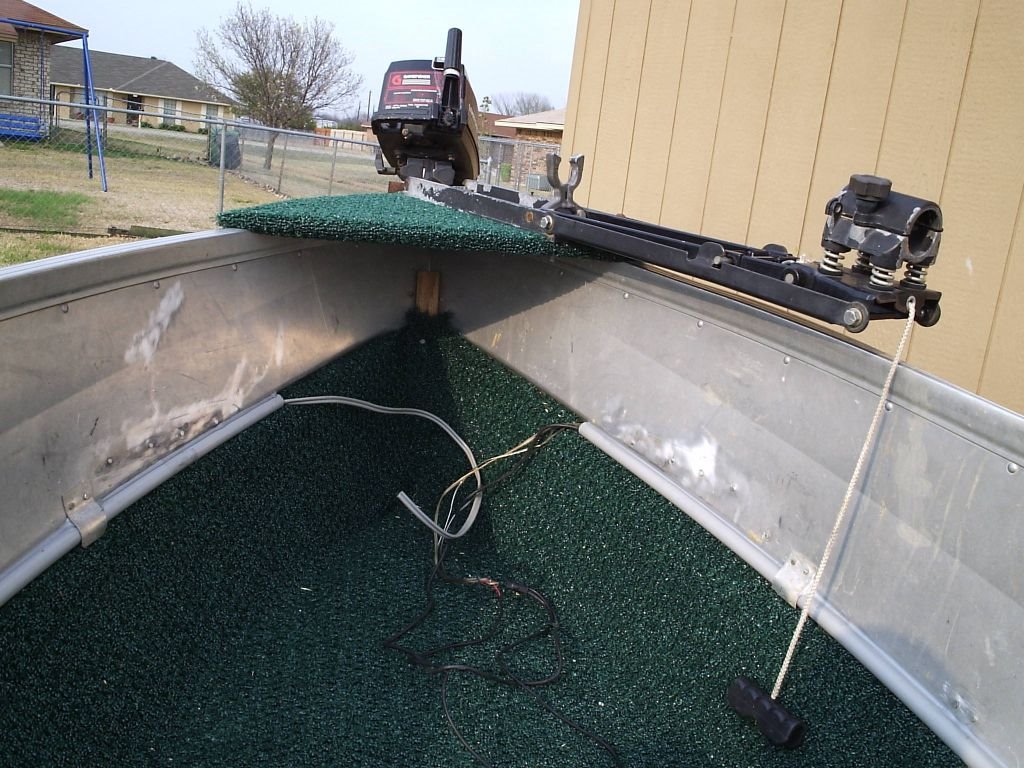


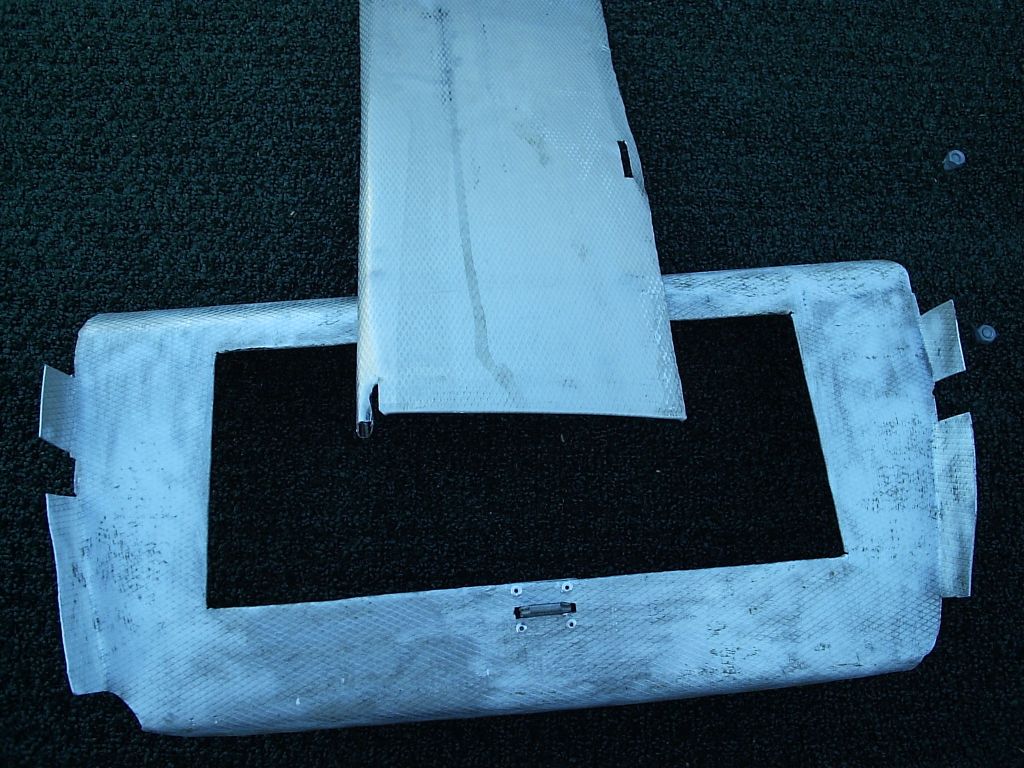
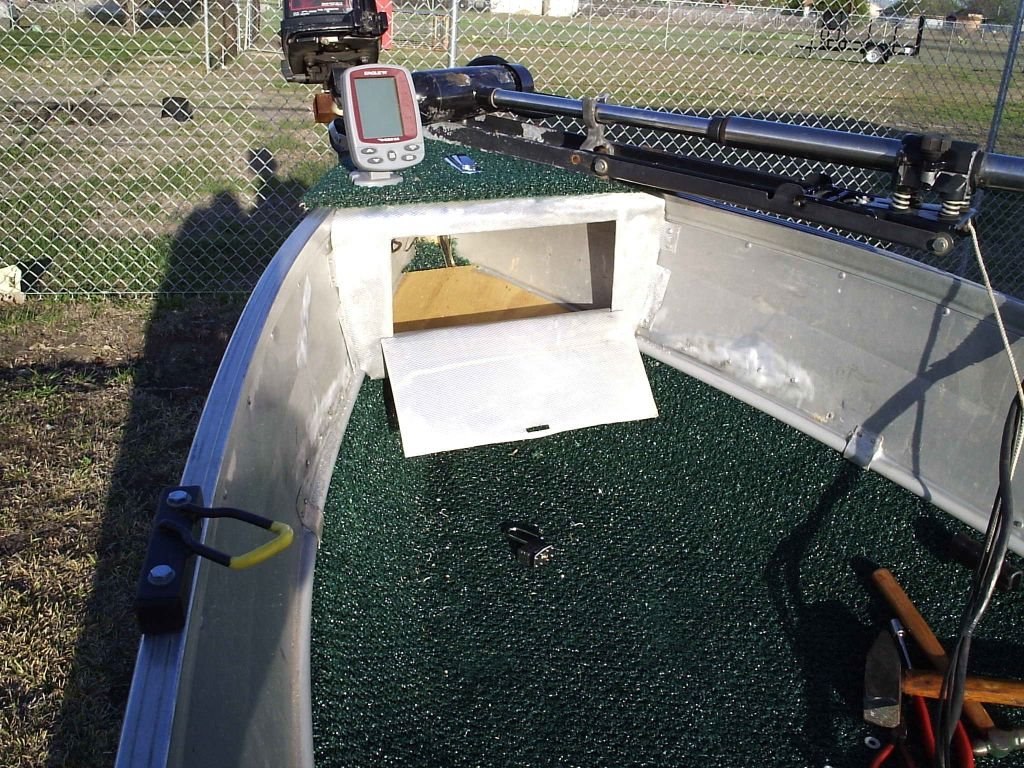
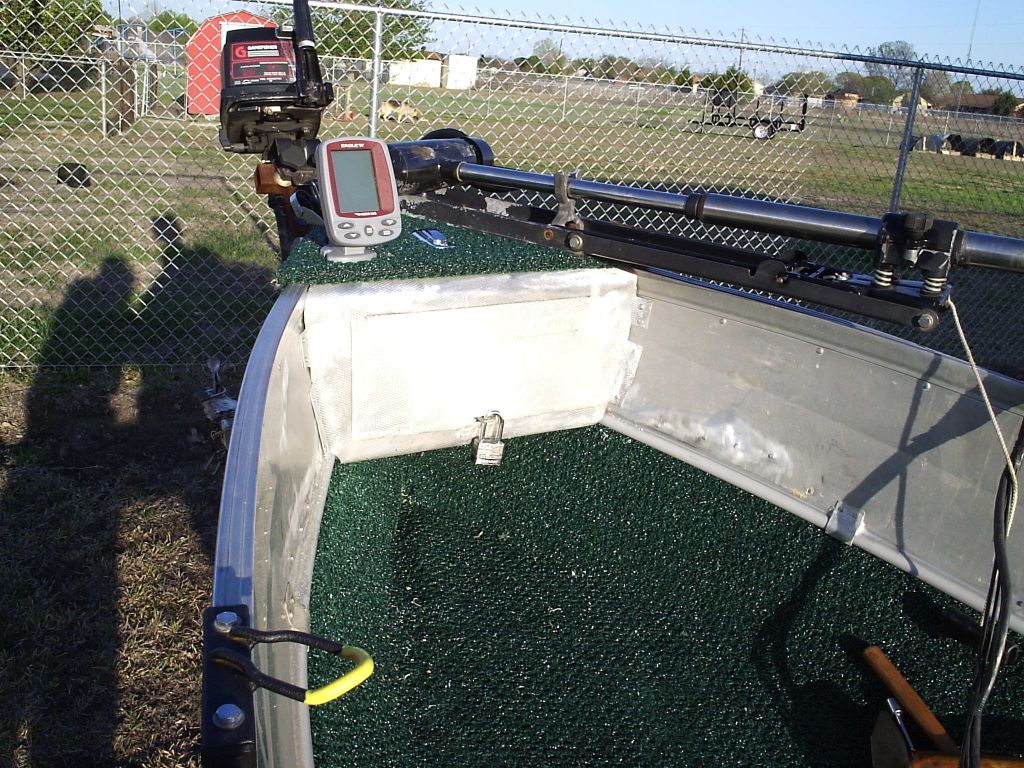
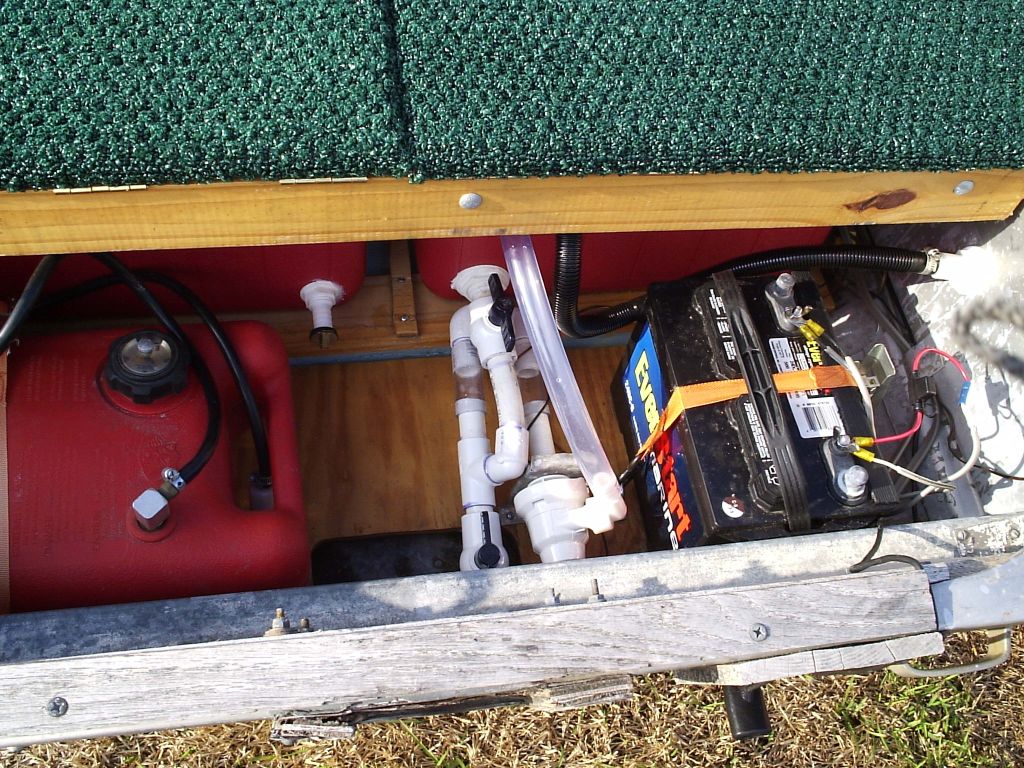
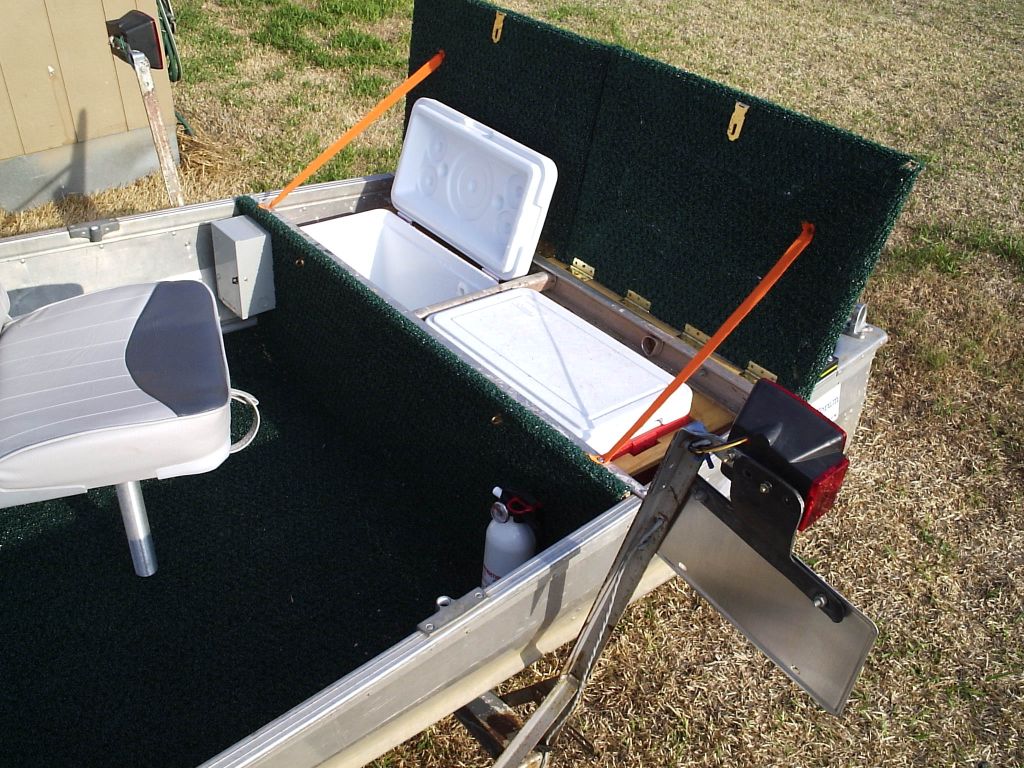
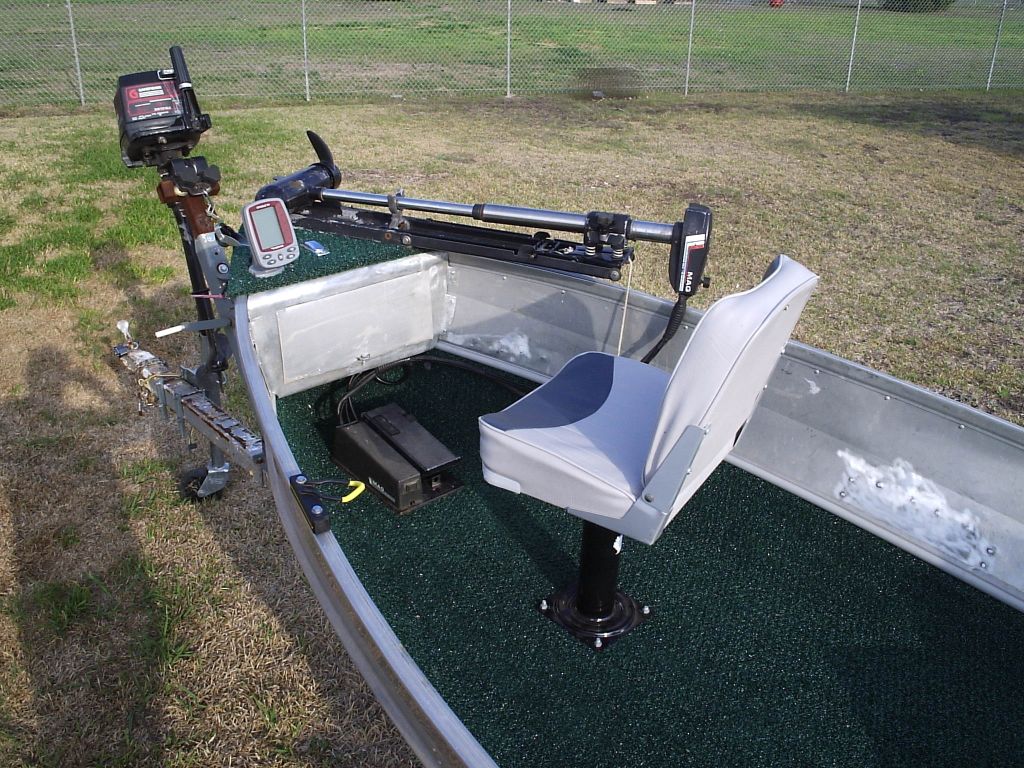
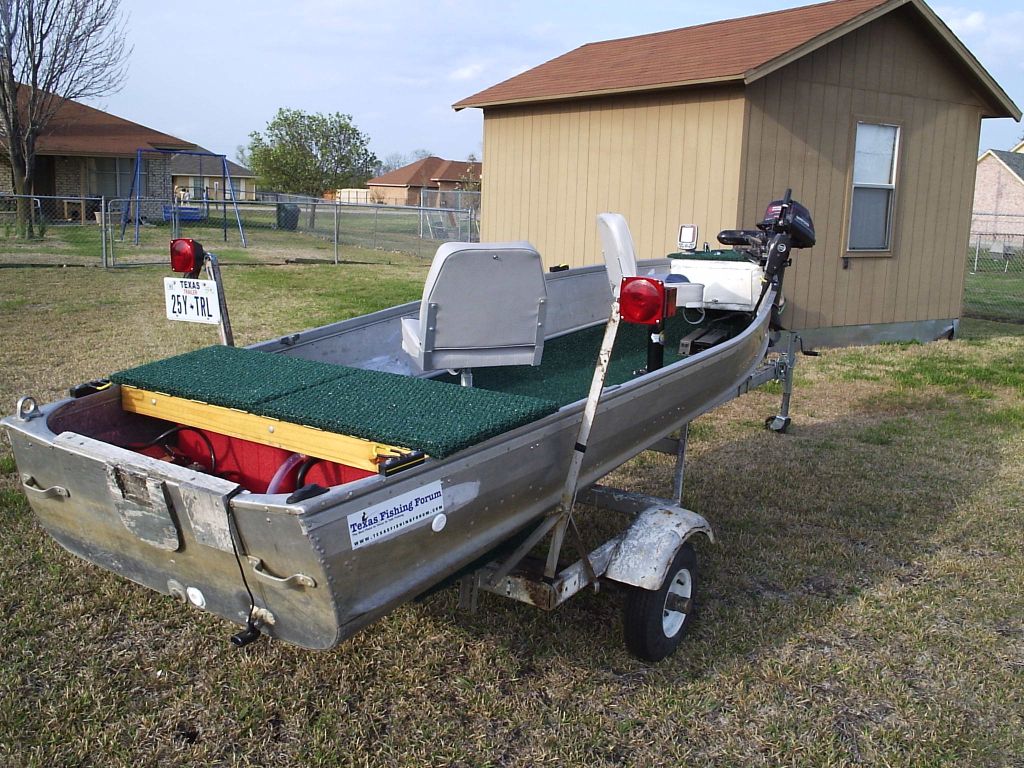 I wanted a larger fishing boat, but not so large that I needed a ramp to launch. I finally found a V-bottom cheap enough for me. I liked my pond boat (you can see in the 2nd picture), but I never felt comfortable in it when the wind started blowing. The V-bottom came with a 5 HP Sears Gamefisher outboard, which needed a carb I was able to pick up cheaply enough on eBay, a battery, tiller steer trolling motor and a tilt trailer which really helps when loading on those small ponds with poor banks for trailering. I took it out a good bit whenever time allowed, but I still wasn't satisfied. (are we EVER?) I'm used to making do with what I have, but I quickly tired of climbing over all the bench seats. Also, I rarely have many hours in a row to fish, and it seemed I was spending too much time loading stuff into the boat, then taking it all out after the trip. I have no place to garage the boat. This was seriously cutting into my fishing time, so I started looking at customizing the boat, spending time on the internet to see what others had done. I decided to go slow, make plans, and do it right the first time, having the final vision in my head the whole way. YEAH, RIGHT! I DID make plans, scratch them out and make more until I had it figured out, but some things just didn't work out like I envisioned, and other ideas came to me as I was working. One of the first things I did was to weld a square tubing "T" onto the winch post upright, so that I could padlock the motor to the trailer. Not only did this keep it secure, it keeps it out of the way when I'm fishing the small ponds where it isn't needed. It is light enough so that it only takes a couple of minutes to put it on the boat if I hit a larger lake. The trailer lights were in bad shape, and the trailer already had uprights, so I bought new lights and mounted them where they SHOULD never be submerged. I also found a heck of a deal on some used Bee-Ready rod holders, and added them to the boat. I knew I wanted a floor and pedestal seats. I decided to mount a short pedestal on the rearmost bench seat, with level floor from there to the bow, and a longer pedestal mounted to the floor at the bow. On the advice of others, I took the boat out and toyed with walking on the benches, and at different levels to find my comfort level. Then I started drilling out rivets to remove seats. With all the riveted boats in the world, you would think that rivets should be easy to find, right? Wrong! I visited and called hardware stores and industrial suppliers, but all anyone had was pop rivets. I even went to marine dealers that service boats, and they said they never had any need for extra rivets. Finally, at the largest hardware store I'd ever been in, I had a clerk smile at me and ask me how many I needed. I used some to plug all the holes I'd just drilled in the hull. Now, I was never any whiz at geometry, and I needed to put a flat floor into a boat with changing bottom levels. The best way I could find was to use water. First to level the boat. Side to side it was easy enough to lay a level across the bow, but for front to rear I eyeballed the level to the watermarkings on the hull. Then I filled the boat with water to the level I wanted the floor to be, and used a scratch awl to mark this level. A trip to the local scrap metal dealer rewarded me with the aluminum angle and square tubing I wanted at scrap prices. I got creative with the tin snips, and was able to trim and bend my light-weight square tubing into floor braces that would pop-rivet to the hull's strengthening ribs. These ribs were only 13 inches apart, so I was able to use ½" plywood for the decking, keeping the weight down. While doing all this drilling and riveting, I kept thinking a built-in live well and ice chest would be SO much nicer than something sitting in the floor, so I started drilling rivets again and removed the rear bench seat. After securing all my floor joists in place, I used cardboard to cut a "trial run" floor. When I was happy with it, I just traced the pattern directly to the plywood. All wood received a generous coating of fiberglass resin to protect it from water damage. It took a little looking around to find ice chests that were just the right size, and I discovered that NAPA auto parts carries thru-hull fittings much cheaper than anybody else I found. A section of aluminum extension ladder from the scrap yard made a great frame for the storage/driver's seat. I cut flotation foam to fit between the support ribs underneath the floor, and mounted the seat bases to the decking before securing the decking to the ribs. (What good would flotation foam do your boat if it wasn't secured?) I thought twice about the permanent seat base when I realized I wouldn't be able to unbolt it after the floor was in, so I used longer bolts from the bottom up. One nut on each secures it to the wood, and the pedestal sits on these nuts, with others above so they could be removed. While I don't think any of the pictures show it, there are two bases for the stab-in type pedestal base. One is close to the live well compartment, while the other (shown in the pic above) is further forward. I added the one shown for the rare times I may have a 3rd in my boat, the seat can be moved forward and the 3rd person can sit on the driver's bench. I originally was going to make a mount up front to hold my transom mount trolling motor, mainly for cost reasons, when I lucked into a used bow mount foot control for $40. I used a middle grade marine carpet from Lowe's, and I am happy with the way it worked out. I bought some UV rated PVC conduit, and secured it to either side at the reinforcing V in the hull. This gave me a finished edge for the carpet, and allowed me to keep the trolling motor wiring separate from the rest. Then I tried to get fancy. I wanted lockable storage in the bow. I used the trusty cardboard again for a template, and made a shelf, then closed it in with some fancy tin-snip and pliers work on one of the old bench seats. I about used up my available cardboard on this, but I really like the way it turned out. I turned back the raw edges on the door frame and door to prevent cuts, and riveted the frame to the hull and bolted it to the shelf and top. It's hard to see in the pics with carpet, but there is room under the "glove box" to stash an anchor or something. It turned out well enough that I'm trying to figure out how to use the other leftover benches to make storage along one side. The live well/ice chest seat/lid is split so you can access just one side. I used one pump and a couple of PVC ball valves for the live well. By choosing which valve to close, I can use the well as recirculating, or as fresh fill with overflow. Controls for pump and lights are mounted on the front of the live well cabinet. The ice chest just drains into the bottom of the boat for now. The battery and gas tank are secured to the floor with ratchet straps. Still to come:
· I want to secure the battery and gas tank from thieves with some kind of rear cover, probably removable. it could always be left in the truck when fishing.
· Rod rack.
· Emergency ladder, probably rope.
· Whatever I find I'm missing after I fish it some.
Yes, that's a Texas Fishing Forum bumper sticker on the side. :)